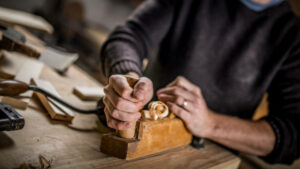
Wood is a natural resource that has been used by humans for centuries for various purposes. One of the most popular ways to dry wood is through kiln drying. Kiln drying of wood is a process that is used to speed up the natural drying process. By using a kiln, the moisture content of the wood can be reduced to a safe level in a short amount of time. In this blog post, we will discuss the process of kiln drying, the benefits it offers, and some best practices to ensure optimal results.
The Process of Kiln Drying
Kiln drying is a process that uses heat and air circulation to reduce the moisture content of the wood. The kiln is an enclosed chamber in which the wood is placed. The heated air circulates the wood, removing the moisture. To achieve optimal results, it is important to carefully control the temperature and humidity in the kiln.
Stages in Kiln Drying
There are three primary stages in the kiln drying process:
Pre-Drying Warming – The goal of this stage is to reduce the moisture content of the wood to a level where it will not support mold or decay.
Curing – This stage is used to further dry the wood and remove any remaining moisture that may cause problems such as warping, cracking, or splitting.
Drying – The wood is once again dried, but this time to a level where it will support mold and decay. This stage is necessary because the moisture content of the kiln-dried lumber needs to be brought down before use in construction projects such as house framing.
The above stages are repeated until all excess moisture has been removed from the wood. The length of time required for each step will vary depending on the type of wood, the size and thickness of the pieces being dried, and other factors. Generally, it takes between 12 and 24 hours to dry wood from its initial moisture content down to six percent.
Development of Drying Stresses in the Kiln
The drying stresses in the kiln are developed during the first stage of drying and can be minimized by properly controlling the rate of drying. Some common methods for reducing these stresses include:
- Frequently check moisture content with a handheld meter to make sure that it is not too high or too low. Also, check if there are any areas where the wood has swelled, warped, or cracked due to excess moisture.
- Using a low-temperature kiln for drying softwoods such as pine and spruce. These types of woods typically require shorter drying times because they contain less lignin which tends to crack under high heat conditions.
How to Use a Kiln to Dry Wood
Several different types of kilns can be used for drying wood, including:
Clothes dryer – A clothes dryer will work if you have a small amount of wood. Place the wood in an old pillowcase or other cloth bag and put it in the dryer on high heat for about one hour.
Commercial kiln – If you are drying a large amount of wood, then you will need to use a commercial kiln. These can be purchased or rented from various suppliers.
Home oven – A home oven can also be used to dry wood, but it is not recommended for larger quantities. Place the wood on a wire rack and set the oven to 200 degrees Fahrenheit.
Dehumidification Kilns – These types of kilns do not use heat to dry the wood. Instead, they remove moisture from the air using a dehumidifier and then circulate it through pipes or ducts.
Vacuum Kilns – This kiln is used in special cases such as when the wood is to be used in an outdoor application. In this type of kiln, the air is evacuated from the kiln and replaced with a gas such as nitrogen. This prevents the wood from absorbing any moisture from the atmosphere.
How to Store Kiln Dried Wood
Once the wood has been kiln-dried, it will need to be stored in an enclosed space with low humidity and temperatures between 65-80 degrees Fahrenheit. It is also important that there be good air circulation so that the moisture from outside does not affect the wood inside.
If you are not able to store the wood in an enclosed space, then you can wrap it in plastic wrap or a moisture-proof bag. Be sure to check the humidity and temperature levels inside the storage area regularly to ensure that they remain within safe ranges.
Moisture Past the Kiln-Drying Point
If the moisture content of the wood goes past the kiln-drying point, then it may not be possible to bring it back down to a safe level. In this case, you will need to discard the wood and start over with fresh lumber.
By following these best practices for kiln-drying wood, you can minimize the development of drying stresses and ensure that your wood is safe to use in your projects.
What’s the Solution to Moisture Past the Kiln-Drying Point?
If the moisture content of your wood has gone past the kiln-drying point, then there are two solutions: discard the wood and start over with fresh lumber, or use a dehumidifier to remove excess moisture. You can buy or rent large commercial dehumidifiers from various suppliers.
If you choose this option, be sure to check the humidity and temperature levels inside the storage area regularly to ensure that they remain within safe ranges.
Best Practices for Kiln Drying Wood
The following are some best practices to ensure optimal results when kiln-drying wood: Use a moisture meter to check the moisture content of your wood. This will help you determine how long it needs to be in the kiln before being dried completely.
- Be sure to use a moisture meter that is appropriate for the type of wood you are drying.
- Keep an eye on the humidity and temperature inside your kiln at all times. If it gets too high, then you may need to add more heat or reduce the amount of time spent in the kiln. Be sure not to exceed recommended levels for either the humidity or the temperature.
- If you are drying thin pieces of wood, be sure to use a fan to circulate the air around the wood. This will help ensure that all of the wood is dried evenly.
The Benefits of Kiln Drying
Kiln drying offers several benefits, including:
- Reduced moisture content – By reducing the moisture content of the wood, you can reduce the risk of mold and decay.
- Reduced warping and cracking – Kiln-dried wood is less likely to warp or crack, making it ideal for furniture, flooring, and other applications.
- Reduced weight – Kiln-dried wood is lighter in weight than wet wood, which can make transportation and handling easier.
- Reduced shrinkage – Kiln drying causes the wood to shrink slightly, which can help reduce the risk of cracking and warping.
Parts of a Kiln
There are several parts to a kiln, including:
Heater – This is what heats the air inside of the chamber. It can be powered by electricity or gas (propane or natural gas).
Fan – A fan circulates the hot air around in the drying chamber and helps to evenly distribute heat throughout. Fan speed can be adjusted by hand or automatically with a control panel.
Drying rack – This is where the wood goes to be dried. It can be as simple as a shelf that allows air to flow around all sides of each piece, or it may have more complex design features like chambers for hot air circulation and even automated controls.
Chamber doors – These allow you to get in and out of the drying chamber.
Control panel – This is where you can set various parameters for the kiln, including temperature, fan speed, humidity levels, and more.
The process of kiln drying offers many benefits for woodworkers and DIYers. By following the best practices outlined in this blog post, you can ensure that your wood is dried correctly and safely.