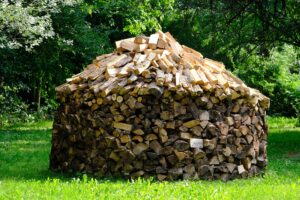
Whether working with green wood or just wanting to soften and shape the material for carving it is important to understand how to dry wood for carving properly. Failure to do so can result in the material cracking as it dries or potentially splitting while carving. Proper drying techniques can significantly reduce these problems.
Air Drying
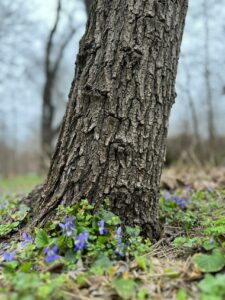
Using air-drying techniques is one of the best ways to soften wood for carving. It’s also the most economical. The process is usually very slow, though, and the outcome depends on the humidity and temperature of your geographic area. As the wood dries, it shrinks and can crack. Controlling moisture content is crucial to prevent these problems.
When a piece of wood is being carved, it’s important to be aware that the cells inside the wood are still swollen with water. Attempting to carve the material while it’s still spongy will force the cells to move as the wood dries, which can result in cracks that are impossible to repair.
A simple solution is to coat the surface of your work-in-progress with a spray bottle of a 50/50 mixture of water and isopropyl alcohol before you even start carving or working. The alcohol is sprayed onto the piece and then enclosed in a plastic bag for an overnight period at the end of each work session. This prevents the evaporation of the water from the surface, which can cause cracking.
If you’re able to set aside enough time for this method, it’s often possible to have your wood ready for carving within a few weeks. This method is particularly effective for softer types of wood, like birch, willow, and alder. These are typically easier to dry than denser varieties of softer wood, such as oak or hickory, that require more time to get to a usable state.
Another benefit of this approach is that it helps to minimize the possibility of mold and mildew in the carved wood. In addition, it’s less risky than soaking the wood in saltwater, which can cause discoloration.
Once the wood has been sprayed and enclosed in a bag, it’s best to keep this routine up until you finish your project. Then, it’s a good idea to let the piece of wood remain in a covered and shaded area, such as under a shed, tree, or porch. The idea is to create a kind of solar kiln by keeping the wood in a sunny spot for the remainder of its drying cycle.
Kiln Drying
Wood that has been kiln-dried is much easier to work with, especially for carving. It has a very low moisture content which means that it doesn’t shrink or warp as the fibers contract and relax. It is also less likely to split or crack, making it a safer choice knife to work with for large pieces like bowls and spoons. Additionally, kiln drying eliminates any mold and mildew that may be present in the wood, as the high temperatures used in the kiln process kill these microorganisms.
The kiln drying process involves a series of steps that ensure that the wood has been dried to a precise level. Logs or timber are first sorted, usually by species and dimensions. Then they are sawed into smaller boards that are suitable for different purposes, including kiln drying. These are then fed into a kiln where the temperature and relative humidity are controlled for a specified time to achieve a particular moisture content. This process is known as a “kiln schedule.” The duration and intensity of the process vary by the species, thickness, and intended use.
The key to successful kiln drying is close monitoring and regular adjustments to the temperature and humidity levels. Moisture meters and visual inspections can help to detect any issues that might arise during the drying process, such as excessive shrinkage or deformation. To prevent the wood from buckling or warping during this process, it is crucial to maintain an even rate of shrinkage. This is achieved by periodically increasing the temperature in the kiln and decreasing the relative humidity, or vice versa.
These changes in the kiln environment are based on the results of moisture readings and visual inspections. These periodic harshening conditions are also known as a “kiln schedule.” This is often done in stages since changing conditions abruptly can cause stress on the wood that could lead to defects. The kiln process can take anywhere from a few hours to several weeks. During this process, the wood is inspected frequently to verify that the kiln schedule is being followed as closely as possible.
Monitoring Moisture Levels
The most critical factor in the success of wood carving is achieving the correct moisture content. A piece of wood that has too much moisture will shrink and crack, while a piece of wet wood with too little may become too flexible and warp or twist. The goal is to achieve the equilibrium moisture content (EMC) of 10 to 12%. While this is not a hard and fast rule, it will help ensure optimal carving results.
A common way to monitor the EMC of wood is with a hygrometer, which is an electronic device that measures the amount of water in a sample of wood. Many carvers use this tool to monitor the progress of their wood as it dries, so they know when the wood has reached the desired EMC. The hygrometer is relatively inexpensive, but it requires some maintenance and calibration to work correctly. To keep it working properly, it is important to keep it away from extreme heat and cold that can damage the sensor.
Another way to speed up the drying process is to use a solar kiln, which is simply a south-facing shed with a clear plastic roof that is heated by the sun. The advantage of this method is that it can be done in a relatively short timeframe, for example, which is important if you need the wood for an upcoming project. Alternatively, you can place the logs in a freezer and then remove them as soon as they are sufficiently dry.
In addition to monitoring the moisture levels of your wood, it is also a good idea to protect it from damage by insects and mold. Using a sealant on the outside of the end grain of the log will help slow down the movement of water through the grain. This will reduce the time it takes for the wood to reach its EMC, and it will help to prevent mold, mildew, insect infestations, and fungi that can ruin your carving project.
Dry wood is harder and more brittle than green wood, which can make it a bit less forgiving if you accidentally make a mistake while carving. As such, it is a better choice for experienced carvers who are not worried about making mistakes that can be costly to fix.
Addressing Common Drying Issues
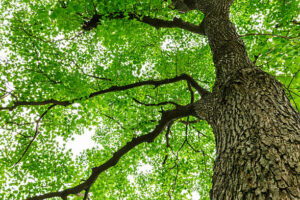
Wood carving requires several skills and tools. It’s also important to know how to properly prepare and dry the wood for use in your projects. This is especially true if you’re working with what’s known as green wood, which is fresh and moist.
While it’s possible to carve knives using this type of material, the process can be more difficult and less forgiving than carving from drier wood. In addition, green wood is prone to cracking as it dries. This is because green wood has a high moisture content and will expand and contract differently than the areas surrounding it.
To help prevent this from happening, you’ll want to be strategic about where and how you store the wood. Storing it in a cool, dark area will help slow the drying process and reduce the chance of cracking. Also, you’ll want to make sure that the piece of wood you’re storing is separated from other pieces of wood and is protected from absorbing moisture by other materials like paper or plastic.
Another way to help address moisture levels and prevent cracking is by spraying the surface of the wood with water. When you’re ready to work on a specific project, simply apply a couple of spritzes of water to the edge of the area where you plan to carve. This will swell the area, helping to keep it from shrinking and creating cracks that can inhibit your progress or cause damage to your finished product.
While you can certainly use green carve dry wood to create a variety of different types of projects, most wood carvers prefer the versatility and stability of working with dry materials. Carving from dry wood is ideal for more complex designs that require a higher level of skill and precision. In addition, projects carved from dry wood are less likely to crack as they’re drying or after being carved. In addition, dry wood can be sanded and reworked without losing its character, which isn’t always the case with green wood.