Wood Drying is an important step in the lumber manufacturing process. If the lumber is not properly dried, it can warp, shrink, and crack after it has been manufactured. In this article, we will discuss some tips and tricks for drying wood quickly and effectively. We will also talk about the importance of kiln-drying lumber, and how to choose the right drying method for your business.
What is Wood Drying?
Wood drying is the process of removing moisture from the wood. If you were to look at a freshly cut log, you would find that it contains about 50% water by weight. This means that for every 100 pounds of wood, there are 50 pounds of water inside its cells. Drying wood makes it lighter and easier to transport or store than fresh-cut wood.
Types of Wood Drying Methods:
When drying lumber, it is important to choose the right method for your business. There are three main ways to dry lumber: air drying, kiln drying, and solar drying. They differ in their methods for removing moisture from the wood and how long it takes them to do so, but all achieve the same result.
Air Drying Steps
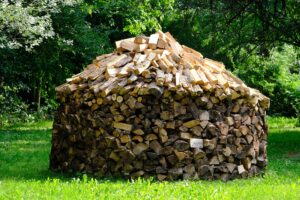
Air drying is the oldest and most common method of wood drying. Air drying is a slow process that takes several months to dry wood properly. The lumber is placed in a stack and the moisture slowly escapes from the wood as it dries. To carry out air-drying the following steps must be taken:
• Cut the logs into short pieces (about 24 inches).
• Split large logs. This will help them dry faster and more evenly, as well as make it easier to transport them later on in the process.
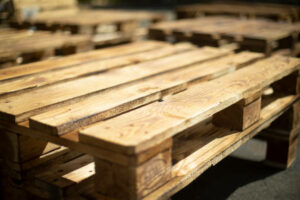
• Stack the wood with spacers between each layer so that air can circulate all sides of the lumber. Make sure to elevate the wood off of the ground so that it does not rot.
• Cover the stack with a tarp or plastic sheeting to keep the rain and snow out.
Air drying is only recommended for small batches of lumber, and it is not suitable for thicker pieces of wood or hardwood.
Kiln Drying Steps
Kiln-drying is a more efficient way to dry lumber, and it dries the lumber much faster than air-drying. To kiln dry lumber, you will need a kiln, which is an oven for wood. The kiln uses heat to remove moisture from the wood over several days or weeks depending on its size and thickness.
Kiln drying has many advantages over air drying, including:
• It can dry lumber much faster than air-drying
• It allows you to dry hardwoods and thick pieces of lumber
• It is a more consistent method, which leads to less warping and cracking in the finished product
To kiln dry lumber, you will need to follow these steps:
• Select the right type of kiln for your business. Many types of kilns are available, so make sure to choose one that suits your needs.
• Set up the kiln and install the necessary equipment.
• Load the lumber into the kiln. Make sure to stack it evenly and use spacers between each layer.
• Monitor the moisture content of the lumber as it dries. This will ensure that the wood is not dried too much or too little.
• Remove the lumber from the kiln once it has reached its target moisture content (usually around 20%).
Though being a more efficient and effective way of drying lumber than air-drying it requires a lot of equipment and is more expensive to set up.
Solar Drying Steps
Solar drying is the slowest and least efficient way to do wood drying, but it is also the cheapest and most environmentally friendly method. Solar drying uses the power of the sun to remove moisture from the wood. It takes a long time to solar dry lumber (usually around one year), but it does not require any equipment or electricity. To solar dry lumber, follow these steps:
• Split the logs into short pieces (about 24 inches long).
• Stack the wood with spacers between each layer so that air can circulate all sides of the lumber. Make sure to elevate the wood off of the ground so that it does not rot.
• Cover the stack with a tarp or plastic sheeting to keep the rain and snow out.
Solar drying is only recommended for small batches of lumber, and it is not suitable for thicker pieces of wood or hardwood.
Stack Drying Steps
Stack drying is a less common method of wood drying, and it involves stacking the lumber in a well-ventilated area and allowing it to dry. This method is not as efficient as air-drying or kiln-drying, but it is a more affordable option. To stack dry lumber, follow these steps:
• Cut the logs into short pieces (about 24 inches long).
• Stack the wood with spacers between each layer so that air can circulate all sides of the lumber. Make sure to elevate the wood off of the ground so that it does not rot.
• Cover the stack with a tarp or plastic sheeting to keep the rain and snow out.
Stack drying is only recommended for small batches of lumber, and it is not suitable for thicker pieces of wood or hardwood.
Factors to Consider When Choosing a Drying Method
In choosing the right method for drying lumber, you should consider the following factors:
• The size of your business and the amount of lumber that you need to dry.
• The type of wood that is being dried (hardwoods take much longer to dry than softwoods).
• The thickness of each piece (thicker pieces will take longer to dry).
• Your budget and the amount of funding that you have for equipment.
• The time frame in which you need to dry the lumber.
• How much labor do you have available to stack or load the lumber?
Wood Drying Tips and Tricks
The first step in wood drying is selecting the right wood for your project. Wood can be dried in two ways: by air-drying, or by kiln-drying. Air-dried lumber has been dried naturally in a shed or other covered structure (this method can take up to two years). Kiln-dried lumber has been dried in a special oven called a kiln. This method is much faster than air-drying, but it is more expensive to set up.
Once you have selected the right type of wood and drying method, you will need to follow these steps:
• Cut the logs into short pieces (about 24 inches long).
• Remove the sapwood and any other defects from the lumber.
• Stack the wood with spacers between each layer so that air can circulate all sides of the lumber. Make sure to elevate the wood off of the ground so that it does not rot.
• Cover the stack with a tarp or plastic sheeting to keep the rain and snow out.
The following tips will help you to dry lumber quickly and efficiently:
• Make sure that the wood is well-spaced when stacking, and that there is plenty of air circulation around each piece. This will help the lumber to dry more quickly.
• Make sure that the stack is elevated off of the ground so that it does not rot or develop mold.
• Cover the stack with a tarp or plastic sheeting to keep out snow and rain, which can cause rotting and mold growth.
Common Problems Encountered When Drying Lumber
There are a few common problems that you may encounter when drying lumber. These include:
- The moisture content of the wood is too high: This can result in warped, twisted, or cracked wood. To avoid this problem, make sure that your stack is well-spaced and elevated off of the ground.
- The lumber is not drying evenly: This can cause the wood to warp or crack. Make sure to turn the pieces of lumber regularly so that they dry evenly.
- The lumber is developing mold: This can be a sign that the moisture content is too high, and it can cause the wood to rot. Make sure that you are using a proper drying method and that your stack is elevated off of the ground.
- The lumber is developing cracks: This can cause the wood to rot, so make sure that you are using an appropriate drying method and space.
- The lumber is warping or twisting: This can be caused by uneven drying. Make sure that you are using an appropriate drying method and space
- The lumber is developing mold: This can be caused by moisture content that is too high, or by improper stacking.


